You don't need a photo booth studio to take great photo strips
A phone or laptop is all you need to make your own Korean-style photobooth strips at home. This guide covers everything from choosing frames and setting up lighting to posing, editing, printing, and taking photos with friends who live miles away.
 26 min read
A lot of people assume that taking photobooth pictures means finding a studio, stepping into a small booth, and waiting for a machine to print their photos. That’s no longer the only option. You can take photobooth pictures online using your phone or laptop, arranging two, three, or four photos into a Korean-style strip without leaving home. The real difference between an average strip and a lovely one usually comes down to lighting, camera placement, and choosing a frame that actually fits your photos.
What is a photobooth, and why are four-photo strips so popular?
A photobooth is a setup that takes one or more pictures and arranges them into a predetermined layout. The most recognizable format is a long, narrow photo strip with three or four pictures stacked vertically.
You’ll often find a little space at the bottom for a date, a name, or a short message.
In Korean-style photo booths, the experience usually begins inside a small studio or automated booth. You stand in front of a camera, watch a countdown on the screen, and strike a few poses before choosing your favorite pictures.
The machine then prints a photo strip, sometimes with colorful borders, stickers, or seasonal decorations.
Camera quality isn’t necessarily what makes photobooth photography special. It’s the sequence of little moments.
In the first picture, everyone might smile politely. In the second, someone makes a silly face. By the third, two friends are trying to form a heart with their hands. The fourth catches everyone laughing because one person got the pose completely wrong.
Four ordinary pictures can tell a much better story together than one perfectly posed portrait.
An online photobooth brings that same idea into your browser. Instead of visiting a studio, you use your phone camera or laptop webcam, take your pictures, choose a frame, and download the finished strip.
You can shoot alone, with your partner, with friends, or as a group. Some online tools even let friends in different cities contribute pictures to the same strip.
There’s no need to travel to a shopping mall or pay for another studio session just because somebody blinked.
Where can you take free photobooth pictures online?
One option is boothsummer.com, a free online photobooth that works directly in your browser.
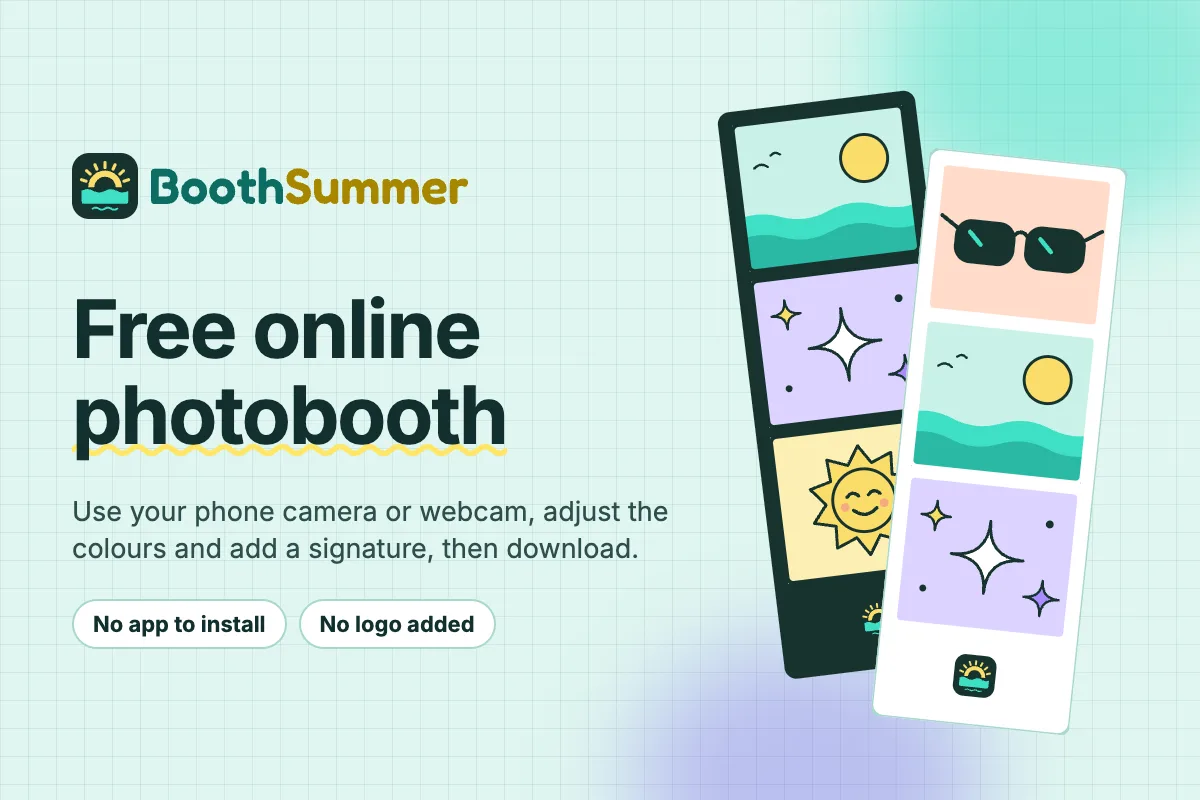
Boothsummer lets you take pictures, choose frames, adjust colors, and download photo strips without paying, creating an account, or installing an application.
Your downloaded photos don’t come with a watermark or a logo.
The website works on phones, laptops, and desktop computers with webcams. It supports modern browsers including Chrome, Safari, Firefox, and Edge. On a phone, Safari or Chrome is a good place to start.
Boothsummer also has both English and Vietnamese interfaces, making it convenient for international users and Vietnamese friends who want to take pictures together.
The frame library includes designs for couples, best friends, school memories, K-pop fans, holidays, and vintage film-inspired photos.
You can choose a simple black-and-white strip, something soft and pastel, or a more decorative frame with hearts, illustrations, and seasonal details.
One particularly useful feature is that you can retake individual pictures. If the third photo turns out blurry, you don’t have to start your entire four-photo session again.
Online photobooth vs. a physical photo booth
| Feature | Boothsummer online | Physical photobooth studio |
|---|---|---|
| Equipment | Phone or computer with a camera | Dedicated photobooth camera |
| Shooting cost | Free | Usually charged per session |
| Location | Home or anywhere suitable | At the studio |
| Frames | Online frame collection | Designs offered by the studio |
| Lighting | You arrange your own | Usually built-in lighting |
| Retakes | Retake individual slots | Depends on the studio |
| Photo delivery | Digital download | Usually printed, sometimes digital |
| Printing | Print the downloaded file separately | Usually printed on-site |
A physical booth still has its advantages. The lighting is already arranged, the camera stays in place, and squeezing into a booth with friends is part of the fun.
An online photobooth is often enough for Instagram Stories, a birthday message, a small gift, or a personal scrapbook.
You get the finished digital file and can decide later whether you want it printed.
Should you use a phone or laptop for photobooth pictures?
Both work well, but they suit slightly different situations.
The easiest way to choose is to think about how many people will be in the pictures and where you plan to place the camera.
Taking photobooth pictures on your phone
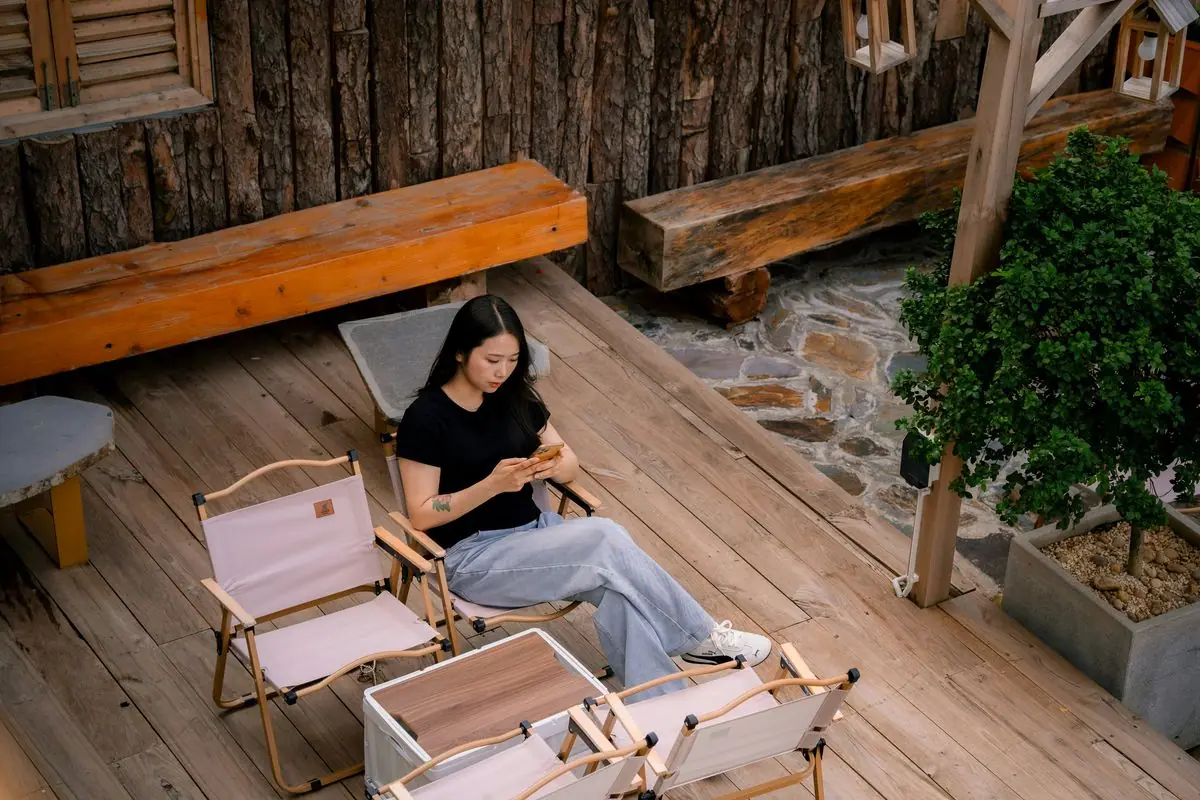
A phone is convenient when you’re shooting alone or with one other person.
Place it on a desk, prop it against something stable, or use a small tripod to get the angle you want.
The front camera is especially useful because you can see your face and check your pose before each shot.
One thing to watch out for is distance.
Some front-facing cameras use a fairly wide lens. When your face gets too close, your nose, cheeks, or forehead may look slightly distorted.
Try placing the phone around 60-100 cm from your face as a starting point, then adjust based on the framing.
Move the phone farther back when you’re shooting as a couple, until both faces and shoulders fit comfortably.
A basic phone stand can make a bigger difference than you might expect. It keeps the camera steady and leaves both hands free for posing.
Once you’re finished, download the photo strip and send it through a messaging app, post it to social media, or save it to your photo album.
Taking photobooth pictures on a laptop
A laptop is a great option for two or three people because the larger screen makes it easier to see where everyone is standing.
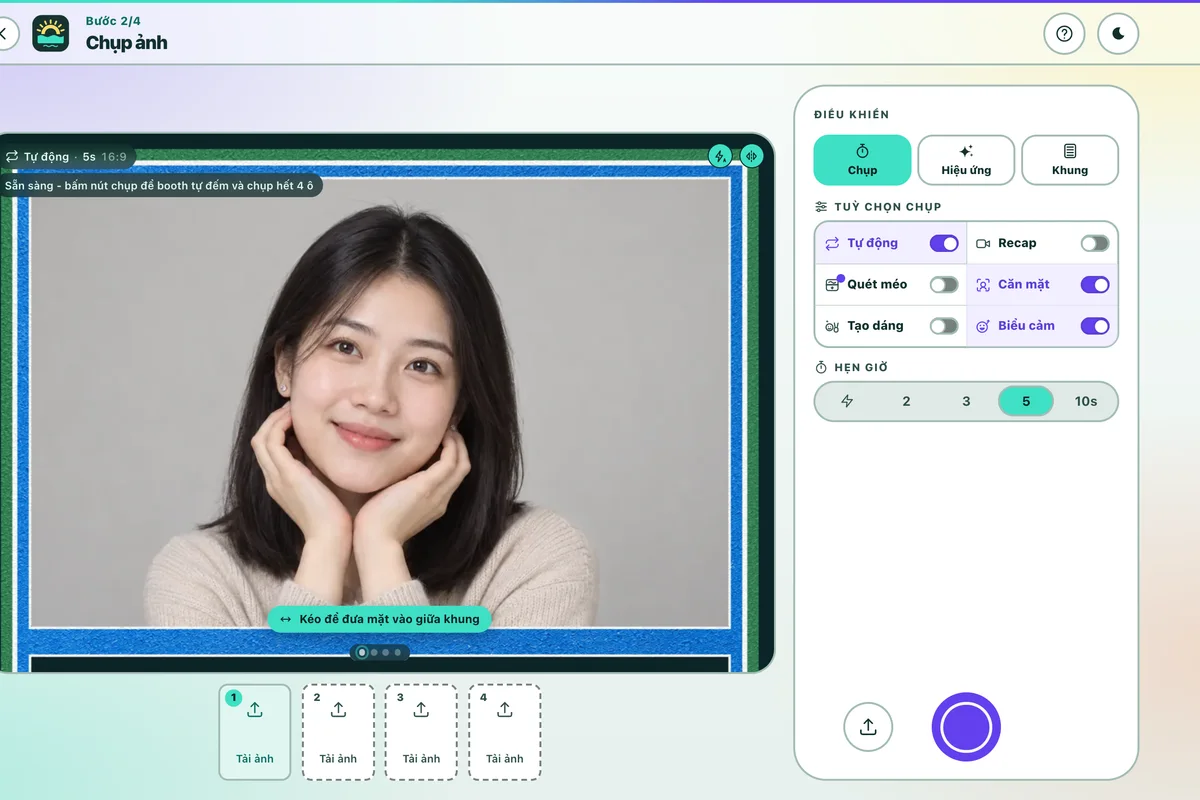
Most laptops already have a built-in webcam, so you won’t need to purchase another camera.
Place the laptop on a stable desk and raise it until the webcam is approximately at eye level.
If the laptop sits too low, the camera may point upward, making your chin and the underside of your face more prominent.
A sturdy stack of books can help raise the screen without complicated equipment.
For group shots, move farther back rather than trying to fit everyone close to the laptop.
Check the corners of the preview before starting the countdown. The people at the edges should have enough space around their heads and shoulders.
Boothsummer also offers a pose suggestion feature on computers. When enabled in the shooting options, it can show a sample pose for each photo slot and automatically capture a picture after you hold the suggested pose for about a second.
It’s useful when you’re taking pictures alone and don’t want to keep reaching for the shutter button.
A grainy laptop webcam often looks better once you improve the lighting, so try that before replacing the camera. A weak webcam will still have limitations, but brighter and more even lighting can noticeably improve the result.
How to set up a photobooth at home
You don’t need to turn your bedroom into a photography studio.
A plain wall, a stable surface, and a decent light source are usually enough.
Pick a simple background
White, cream, light gray, and pastel-colored walls work well with many Korean-style photobooth frames.
A plain curtain can also make a good background, especially when you want a softer look.
Before taking pictures, check what the camera actually sees.
There might be a power socket beside your shoulder, clothes hanging behind the door, or an untidy corner of the bed entering the frame.
You don’t need to clean the entire room. Just tidy the area visible in the preview.
For birthdays and special occasions, consider adding a few small decorations: balloons, paper flowers, a stuffed animal, or colorful ribbons.
Keep them toward the edges of the composition. Your face should remain the main subject, especially when each photo will appear quite small in the finished strip.
Get the lighting right before choosing a filter
Lighting makes a noticeable difference to photobooth pictures, particularly when you’re using a laptop webcam.
During the day, one of the easiest setups is to sit facing a window.
Natural light coming from the front or slightly to one side can brighten your face, soften shadows, and make skin tones look more even.
Avoid standing directly in front of a bright window with the camera facing toward it.
The camera may expose for the bright background and leave your face looking dark.
Direct sunlight creates harsh shadows, and pulling a thin curtain across the window softens them. The fabric helps diffuse the light, making it softer.
A cloudy afternoon can actually be a good time to take portraits because the light tends to be less harsh.
At night, place a desk lamp or ring light in front of you, slightly above eye level.
You don’t need the brightest possible light. You want your face to be clearly visible without creating strong shadows underneath your eyes.
A harsh desk lamp softens when bounced off a nearby white wall, provided the lamp can be positioned safely.
Avoid mixing too many differently colored lights.
For example, warm yellow room lighting combined with blue light from a computer screen can make one side of your face look orange and the other side unusually cool.
Keep the camera steady and leave space around your face
Eye-level camera placement is a reliable starting point for portraits.
You can still tilt your head, lean forward, or move your shoulders to make different poses.
Just avoid starting with the camera extremely high or low.
Leave a little space above your head and beside your shoulders.
Photobooth frames often have a different aspect ratio from the original camera image, so some areas may be cropped.
This matters even more when you’re using a decorated four-photo frame. Hands placed close to the edge can disappear behind borders or stickers.
When photographing a group, check everyone’s position before pressing the shutter.
People standing on the outside should have their shoulders and hands comfortably inside the frame.
Should you choose a 2-, 3-, or 4-photo frame?
It’s worth deciding this before you start taking pictures.
The number of photo slots affects how you pose, how the finished strip looks, and how large each picture appears.
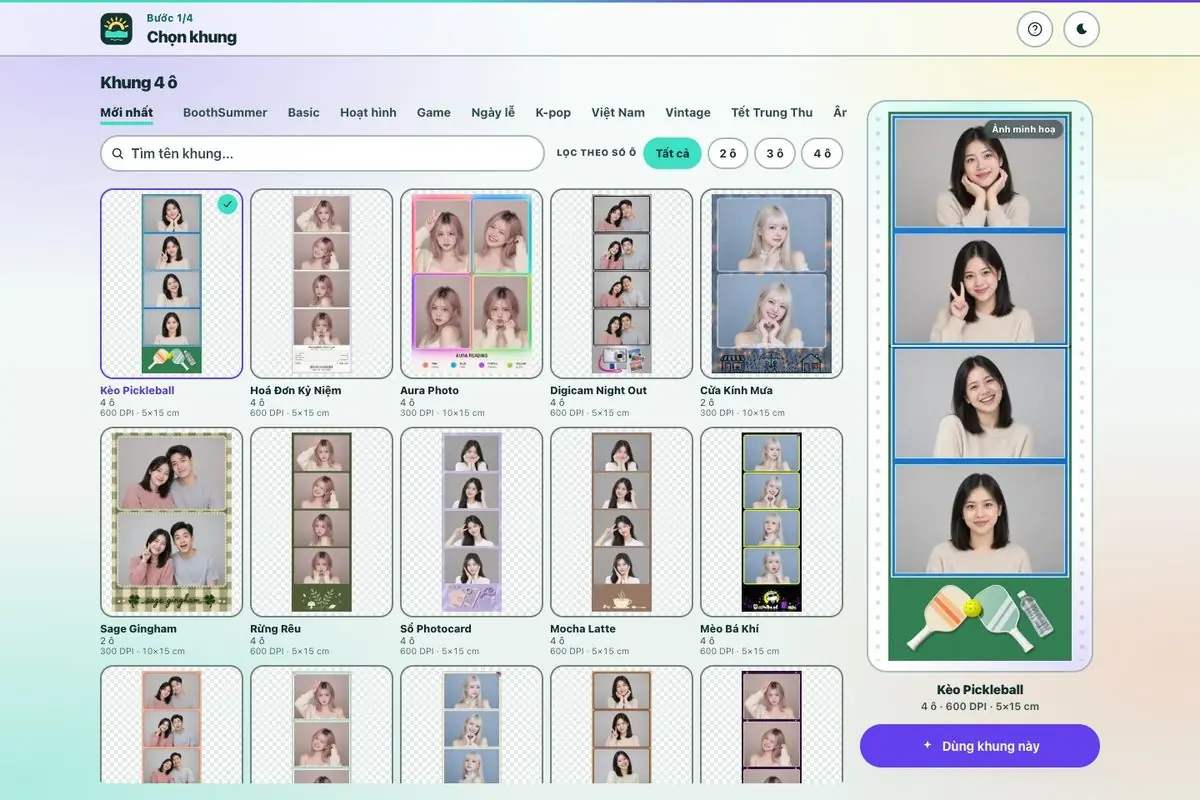
The boothsummer photobooth frame library sorts designs by theme, name, or number of photo slots.
The catalog also shows the layout and print dimensions of individual frames.
Two-photo frames: simple and spacious
Two-photo layouts are a good choice for couples or anyone who wants a little more space inside each picture.
You could take one smiling portrait and one playful picture.
Or you could use a photo of each person if you’re making a strip with someone who lives far away.
Because there are fewer pictures, the layout can feel cleaner and less crowded.
Two-photo frames are also useful when you already have a pair of portraits you want to combine.
Three-photo frames: a short visual story
Three pictures create a natural sequence.
The first can be a simple smile, the second a different expression, and the third a playful pose or a glance toward your friend.
Three-photo strips work nicely for best friends, small groups, or travel memories.
Depending on the frame design, the photo slots may also leave more room for faces and upper-body poses than a tightly arranged four-photo strip.
Four-photo frames: the classic Korean photobooth look
Four-photo strips are probably the format most people imagine when they think about Korean-style photobooth pictures.
Four slots give you enough room to change expressions, try different hand gestures, or tell a tiny story from beginning to end.
However, not every four-photo frame has the same shape.
Some boothsummer designs use a narrow 5 × 15 cm vertical strip, while others have a larger 10 × 15 cm composition.
That’s why the preview matters more than the number of pictures alone.
A small strip to tuck into your phone case or journal suits a long, narrow layout better.
For a photo you plan to frame or display on a desk, a larger layout with more space around the pictures might look better.
Decorative frames tend to work well with simpler outfits. Plain black, white, or vintage frames leave more room for colorful clothing and expressive poses.
How to take photobooth pictures online with boothsummer
Once your camera and lighting are ready, the process is straightforward.
The steps are the same on a phone or laptop.
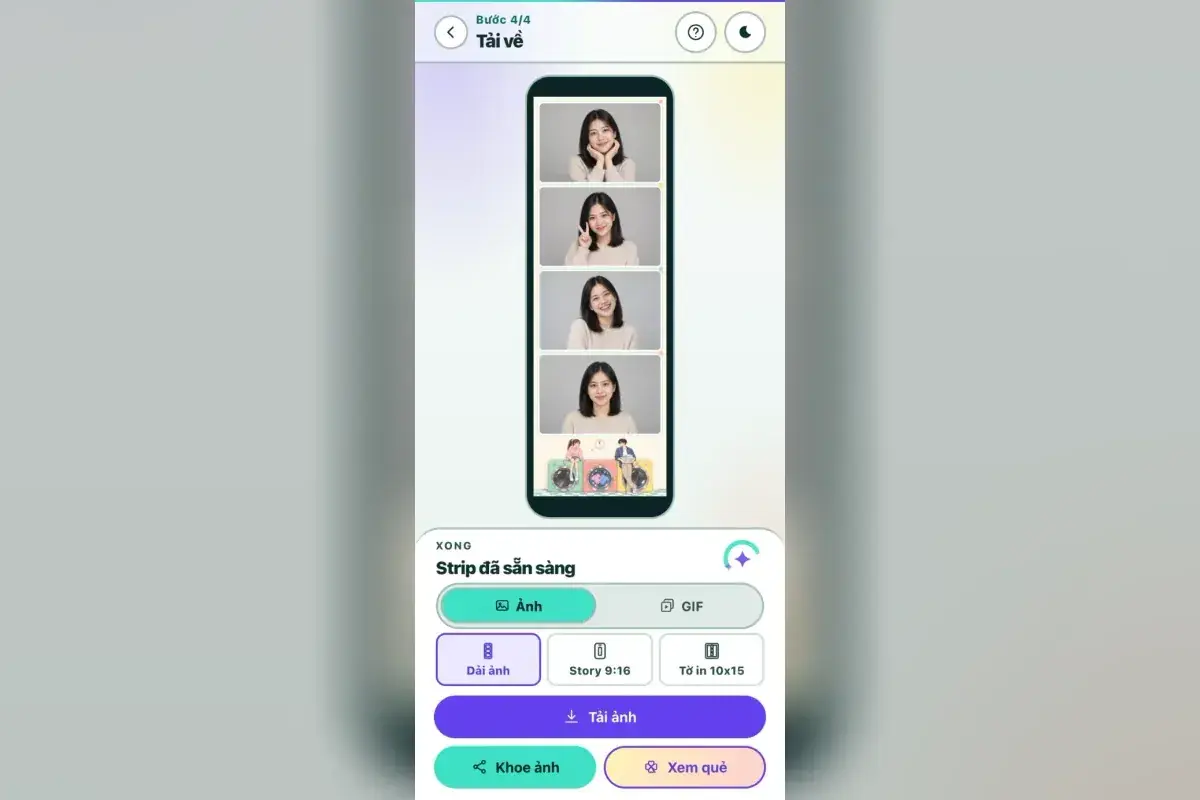
Step 1: open boothsummer and choose your frame
Go to the boothsummer online booth.
The first screen lets you select a frame.
Browse the latest designs or filter by themes such as Couple, Bestie, K-pop, Vintage, and School.
You can also choose frames by the number of photo slots.
After finding a design you like, select Use this frame.
The number of slots determines how many pictures you’ll take.
Boothsummer asks for camera permission after you confirm your frame, so don’t worry if the webcam preview isn’t visible immediately.
Step 2: allow camera access and take your photos
When your browser requests camera access, choose Allow.
The viewfinder will appear, letting you check your position and adjust the camera.
Supported devices also switch between front and rear cameras.
Boothsummer offers several countdown options, including immediate capture and timers of 2, 3, 5, or 10 seconds.
If you’re standing away from the device and taking pictures alone, a five- or ten-second timer gives you enough time to get into position.
For two people already sitting in front of the camera, two or three seconds may be enough.
You can also use automatic shooting to capture the slots in sequence.
If you’d rather change accessories, fix your hair, or adjust your position between pictures, manual capture gives you more control.
Don’t like one of the pictures? Retake that slot instead of starting the whole session again.
You can also use existing photos.
Choose the upload option for a slot and select a picture from your device. This is handy when you’re combining selfies from a trip, concert, birthday party, or older photo album.
Step 3: edit colors, beauty settings, and text
After taking your pictures, move to the editing screen.
Boothsummer offers color filters, LUT color grading, beauty adjustments, effects, and handwritten signatures.
Start with color.
Choose a tone that complements the original lighting, then decide whether you want skin smoothing or additional effects.
Switching the color setting back to Original undoes an overedited look, and any effect you don’t want can be turned off.
Individual pictures can be repositioned or zoomed inside their slots too.
This is useful when someone’s face sits too close to the edge or part of their hair gets cropped.
Once the pictures look right, add a name, date, or short message.
Boothsummer offers handwriting-style fonts for signatures, including support for Vietnamese characters with diacritics.
Simple messages like "Besties Forever," "Summer Memories," or "Class of 2026" work well.
Try to keep the text short enough to remain readable when the strip is printed at a small size.
Step 4: preview and download your photo strip
When you’re happy with your edits, open the final preview.
Depending on the frame and available features, boothsummer offers several download formats:
- Photo Strip: Keeps your selected frame and original strip layout.
- Story 9:16: Places the finished strip on a vertical background suitable for social media stories.
- 4x6 Print: Arranges two copies of a compatible vertical strip on one printable sheet.
- GIF or Video: Available when supported motion effects or video features are used.
Choose the format that suits your plans.
Static photo strips are downloaded as JPEG files.
On a laptop, the file usually goes to your browser’s default Downloads folder. On a phone, check your Photos or Files app if the picture doesn’t appear immediately.
Easy photobooth poses for solo shots, couples, and friends
You don’t need to come up with an entirely new pose every time the countdown starts.
For a four-photo strip, preparing four simple expressions or gestures is enough.
Solo photobooth poses: change your expression, not your entire position
Taking photobooth pictures alone gives you complete control over the frame.
You don’t need to wait for anyone else or worry about somebody covering your face.
Try this four-photo sequence:
- Look straight at the camera with a gentle smile.
- Make a peace sign beside your cheek.
- Tilt your head, rest your chin on your hand, or make a surprised face.
- Finish with a heart shape using both hands.
You can keep the same distance from the camera throughout the session.
The changing expressions will make the strip feel lively without requiring complicated movements.
Boothsummer’s pose suggestions can help on a computer when you’re unsure how to pose.
Enable the feature in the shooting options and follow the sample gestures shown for individual slots. Depending on the pose, the system can automatically capture a picture after you’ve held the suggested position for about a second.
You can also skip suggestions and take pictures manually.
Couple photobooth poses: make the pictures feel connected
Couple photo strips often look more interesting when the two people interact instead of simply smiling at the camera four times.
For the first picture, sit close together and smile.
In the second, turn toward each other.
For the third, use one hand each to form a heart.
Finish with a funny expression, a cheek-to-cheek pose, or one person resting their head on the other’s shoulder.
You don’t need elaborate poses.
In small photobooth pictures, facial expressions and hand gestures are usually more noticeable than full-body movements.
One person much taller? Sitting together may help bring both faces to a similar height.
That also makes it easier to keep the camera level.
Best-friend photobooth poses: let different personalities show
Best-friend photo strips don’t need everyone to look identical.
One person can smile while the other pretends to be annoyed.
One can give a thumbs-up while the other shakes their head.
By the final photo, both friends might be laughing or copying each other’s expressions.
Y2K, pastel, K-pop, and vintage-style frames are particularly fun for this type of shoot.
For groups of three or four, use a wider camera angle or move farther away from the device.
Try not to bring your hands too close to the lens. They may look disproportionately large and cover the face of someone standing behind you.
School and graduation photobooth pictures
Trying to squeeze an entire class into one laptop webcam shot rarely gives everyone a clear face.
For a larger group, it’s often better to split into smaller groups and create several photo strips.
Choose a school-themed frame, coordinate your clothing, or use simple props such as notebooks, graduation caps, or handwritten signs.
If you really want the whole class to appear in one strip, take a separate group photograph with a wider-angle camera and upload it into one slot.
The remaining slots can feature smaller groups, teachers, or playful behind-the-scenes pictures.
Choose a frame with enough clear photo space, especially when many faces need to remain visible.
How to take photobooth pictures with friends who live far away
You don’t need to be in the same room to create a photo strip together.
One friend might be studying in Hanoi, another working in Ho Chi Minh City, while someone else lives overseas.
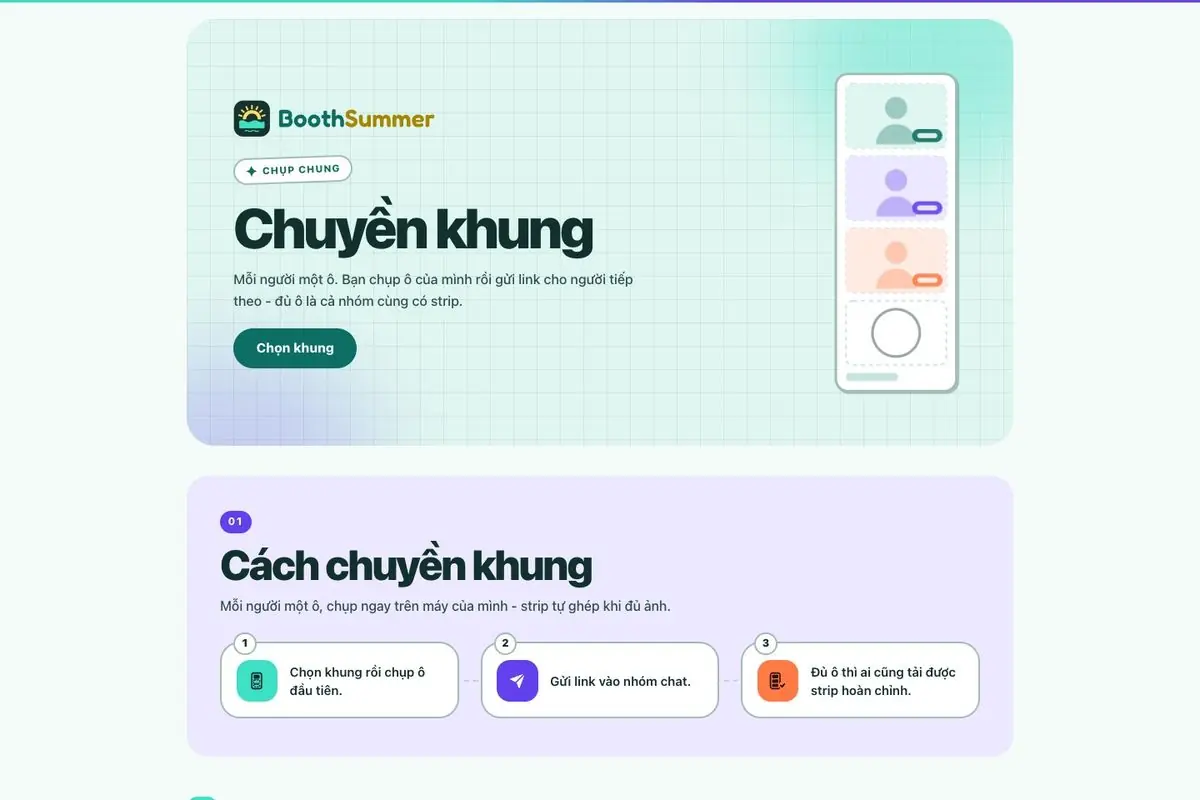
With boothsummer’s chain strip feature, everyone can contribute a picture from their own device.
The idea is simple: each person takes one or more slots in a shared frame.
Nobody needs to be online at the same time.
The first person chooses a frame, takes the opening picture, and creates a link.
They then share that link in a group chat.
The next person opens it, sees which slots are already filled, and takes a picture in an empty slot.
Once all the slots are complete, the finished strip is available for the group to download.
For example, four friends living in different cities could choose a four-photo frame.
The first person takes their picture before work. The second adds theirs during lunch. The remaining two finish after dinner.
By the end of the day, everyone has contributed to the same photo strip without meeting in person.
How to make remote photobooth pictures look consistent
Pictures taken in different rooms can have noticeably different lighting.
One might look bright and neutral, another warm and yellow, and a third blue from a computer screen.
Before sharing the link, agree on a few simple details:
- Use similar framing, such as head-and-shoulders portraits.
- Keep the main light in front of the face.
- Choose a consistent color style.
- Agree on a date or short message for the strip.
- Give everyone a different expression or pose.
Some color and effect settings can carry over between slots, helping the finished strip feel more cohesive.
After expiration, the link stops working and the stored files are removed through the service’s retention process.
So don’t start the strip early in the week and assume everyone can finish whenever they like.
Once the last photo is added, download the finished file and save it somewhere you can find again.
How to edit photobooth pictures for a Korean-style look
A beautiful Korean-style photo strip doesn’t need an intense filter.
Clear faces, soft lighting, and consistent colors are usually more important than dramatic editing.
Warm filters for couples and cozy pictures
Warm colors can make photographs feel soft and inviting.
They pair nicely with cream, brown, light pink, and vintage-inspired frames.
However, if your pictures were already taken under strong yellow lighting, adding too much warmth may turn skin tones orange.
Check the color of your face and the whites of your eyes before saving.
Cool filters for modern, minimal styles
Cool tones can work well with blue, gray, silver, and K-pop-inspired frames.
They often create a cleaner, more understated look.
The drawback is that cool filters can make already dark pictures appear pale or lifeless.
If your face loses too much warmth, reduce the filter strength or return to the original colors.
Faded film colors for vintage photobooth strips
Faded film filters soften strong colors and create a slightly nostalgic atmosphere.
They’re well suited to best-friend pictures, graduation memories, and scrapbook-style frames.
A plain white shirt, a cream wall, and a softly colored frame can already create the right mood.
You don’t need to cover the entire strip with vintage stickers.
Black and white for timeless portraits
Black-and-white photobooth pictures put more attention on expressions, contrast, and light.
They work particularly well with simple borders and minimal decoration.
However, turning a picture black and white won’t fix poor lighting or a blurry face.
If the original photograph is extremely dark, improve the lighting before shooting again rather than relying on a filter afterward.
Should you use skin smoothing?
Boothsummer includes beauty adjustments that can be reduced or turned off.
Light smoothing may help make skin tones appear more even in close-up pictures.
But too much can remove facial texture and make everyone look unnaturally smooth.
Compare the edited version with the original before deciding.
For group photographs, subtle adjustments usually work better because everyone’s face should still look recognizable and natural.
Add animated effects and short photobooth videos
Boothsummer isn’t limited to still pictures.
It also offers animated overlays such as falling snow, sparkles, flying hearts, and confetti.
These effects can appear over the camera preview, letting you see where the decoration will sit before taking your picture.
You can adjust the intensity of supported effects.
Falling snow might look lovely with a winter-themed frame, while flying hearts suit a romantic couple strip.
For printable photos, keep decorations relatively light. Too many animated elements or decorative graphics can make a small strip look crowded.
There are also two ways to create moving content.
Video recap
Boothsummer’s Video Recap feature records short moments around each shutter press.
You need to enable it before shooting.
The completed recap combines the movement from the individual slots into a short video lasting roughly five seconds.
It doesn’t include sound, and you can choose different playback speeds.
For example, if you’re raising your hands to make a heart, the recap can preserve a brief movement leading into the final pose.
This feels different from a simple slideshow of still pictures.
Animated photo effects
The second option is to animate effects over photographs you’ve already taken.
The photos remain still while hearts, snow, or other decorations move across them.
This is useful if you forgot to enable Video Recap before your session.
Video recording and export depend on browser and device support, so some devices may not show every video option.
Why are my online photobooth pictures dark, blurry, or cropped?
Many common photobooth problems can be fixed without changing devices or switching websites.
Check lighting and camera placement first.
My face looks dark even though the room is bright
Look for a bright window or lamp behind you.
A room can appear well lit to your eyes while your face looks dark on camera.
Move so the main light falls on your face instead of shining directly into the lens.
Boothsummer also has a screen-light option that can brighten the display during capture.
It may help when you’re close to the screen, although it won’t replace proper lighting if you’re standing far away.
My pictures look blurry when I change poses
This often happens when the lighting is weak and you move while the camera is taking the picture.
Add more light, keep the device stable, and hold your pose briefly as the countdown reaches zero.
Try shooting in brighter conditions when you want to capture movement deliberately.
Boothsummer also offers a Time Scan effect that intentionally creates unusual stretched or shifting results when you move during the scan.
That is different from accidental motion blur.
My head or hands are cut off
The selected frame may have a different aspect ratio from your camera’s preview.
Leave more space around your head and shoulders before shooting.
During editing, drag or zoom the photo within its slot.
Avoid zooming too far just to fill every corner. You might lose part of your hair, chin, or hands.
My camera won’t open
Check the camera permissions in your browser.
If you previously selected Don’t Allow, you’ll need to change the website’s camera permission in your browser or device settings.
On a laptop, close other applications that might be using the webcam.
On a phone, try an updated version of Safari or Chrome.
If the camera still doesn’t work, you can upload existing pictures into the frame instead of taking new ones.
How to download and print your photobooth strips
Digital photobooth strips are convenient for sharing, but a printed strip is something you can hold and keep.
You can slip one into a notebook, keep it in your wallet, attach it to a gift, or place it inside a phone case.
Know the difference between the finished strip size and the paper size used for printing.
What size is a standard photobooth strip?
The classic narrow photobooth strip is commonly printed at:
2 × 6 inches = 5.08 × 15.24 cm.
That measurement describes the entire finished strip, including all photo slots, borders, and text.
It doesn’t refer to the dimensions of one picture inside the strip.
Boothsummer offers vertical frames suitable for this format, along with other layouts measuring approximately 10 × 15 cm.
Always check your chosen frame’s print dimensions rather than assuming that every four-photo frame has the same size.
Printing two photobooth strips on one 4x6-inch sheet
A standard 4 × 6-inch photo sheet measures 10.16 × 15.24 cm.
It’s often sold or described as 10 × 15 cm paper, particularly outside the United States.
Geometrically, two 2 × 6-inch strips fit side by side on one 4 × 6-inch sheet.
For compatible vertical frames, boothsummer offers a 4x6 Print download option.
This creates a print-ready file with two copies of the same photo strip arranged next to each other.
The exported JPEG measures 2400 × 3600 pixels, corresponding to 600 pixels per inch at the intended 4 × 6-inch size.
You don’t need to open another editing application just to duplicate the strip.
Download the file and send it to a photo printing service.
One small detail matters: some photo printers enlarge images slightly when using borderless printing.
That can cut off decorative borders or text near the edges.
Check the print preview before ordering.
If you need the finished strips to measure exactly 2 × 6 inches while keeping every edge intact, printing on larger paper and trimming down may be safer.
Printing photobooth strips at home
An inkjet printer that takes photo paper can print the strips at home.
Glossy paper gives a finish similar to traditional photobooth prints.
Matte paper reflects less light and can be a nice choice if you want to write something on the back.
Open the 4x6 Print file and select the appropriate paper dimensions and media type.
Check the preview before pressing Print.
Avoid automatically stretching the image to fill the page if you need to keep the original borders.
On the other hand, a Fit to Page setting can make the strips smaller than intended if the printer leaves margins.
Print one test sheet first.
Colors may look different on paper because of printer ink, paper coating, and the brightness of your screen.
Let the ink dry according to the paper manufacturer’s instructions, then separate the two strips using a ruler and paper cutter.
There’s no need to buy a printer just to make a handful of photo strips each year.
If you only want a few copies, sending the downloaded file to a local photo lab is usually simpler.
For detailed sizing and printing instructions, see boothsummer’s guide to printing photo booth strips without cropping.
How much does it cost to print photobooth pictures?
Taking and downloading pictures on boothsummer is free.
Printing is a separate expense.
The amount you pay depends on the photo lab, paper finish, number of copies, and whether you want the strips cut individually.
When contacting a printing service, tell them you already have a completed 4 × 6-inch print layout.
Ask for the price of printing that file without additional photo editing or design work.
Also ask whether cutting the sheet into two strips costs extra.
Don’t send a single long photo strip and simply request a "4x6 print" without explaining the layout.
Some printing services may crop it, enlarge it, or center the strip on the page in a way you didn’t intend.
Are online photobooth pictures private?
Privacy is worth checking before using any online photo tool, particularly when you’re taking personal pictures or creating a group strip.
On boothsummer, ordinary photo capture, color adjustments, beauty editing, video processing, and frame composition happen locally on your device.
Your photos aren’t automatically uploaded to a server just because you turn on your camera or download a strip.
With chain strip, the photos have to be stored temporarily so the next person can see the existing slots and contribute their picture.
The retention periods are different depending on the type of link.
A private sharing link remains accessible for 30 days. An unfinished chain strip is accessible for 48 hours after creation, while a completed one remains accessible for 30 days.
Expired chain strip files go through a cleanup process before permanent deletion.
Anyone who has a chain strip link can view the pictures already contributed and the completed strip.
For that reason, share the link only with people you trust.
It’s also considerate to ask your friends before posting a completed group strip publicly.
Pictures made just for yourself only need the ordinary booth: download your file and avoid creating a sharing link entirely.
Creative ways to use photobooth pictures beyond Instagram stories
A photo strip doesn’t have to be another picture that disappears into your camera roll.
Because it’s small and easy to personalize, it can become a thoughtful little gift.
Make a monthly couple photo strip
Choose one frame and take a new strip on the same date every month.
Keep the layout consistent while changing your outfits, expressions, or backgrounds.
After several months, you can put the strips side by side.
They become a simple record of ordinary days together, without needing a professional photoshoot.
Create a birthday strip for your best friend
Pick a frame that matches your friend’s favorite colors or interests.
Use four pictures from different moments in your friendship, or take new photos together.
Add a birthday message and print two copies so you can both keep one.
For friends living far apart, chain strip lets each person contribute a picture without arranging a video call.
Turn travel memories into a photobooth strip
You don’t have to use the live camera every time.
Upload four existing portraits from different trips and place them inside a frame.
One could be from a mountain getaway, another from a beach, another from a train journey, and the last from a café.
Choose a simple vintage or film-inspired design to tie the pictures together.
It’s a lovely way to keep several travel memories in one small print, especially when you don’t have room for a full photo album.
Make graduation keepsakes for your class
Choose a school-themed frame and use pictures from the final semester.
You can combine a group photograph, a classroom moment, a picture with a favorite teacher, and one silly photo with your closest friends.
Print several copies and write short messages on the back.
A small strip can be easier to exchange than a large framed photograph, particularly when everyone is packing up and preparing to move away.
Start a long-distance friendship tradition
For friends who live in different cities or countries, try making one shared strip for birthdays, holidays, or the beginning of each year.
Everyone can contribute from their own home.
You might not be in the same room, but the final strip still has everyone in it.
It doesn’t matter if each picture has a different background or if somebody’s hairstyle has completely changed.
Those differences are part of what makes the collection interesting over time.
For better photobooth pictures at home, prioritize lighting before filters: sit near a softly lit window during the day or place a lamp in front of you at night, and keep the camera steady. Before printing multiple copies, check that your file matches the intended 4 × 6-inch paper size and order one test print so you don’t lose the borders.
Frequently asked questions
Where can I take photobooth pictures online for free?
You can use boothsummer directly in your phone or computer browser. It offers free photo capture, frames, color editing, and downloads without requiring an account or app installation. Downloaded images don't include a watermark.
Can I take photobooth pictures on a laptop without a webcam?
Yes, but you won't be able to take live pictures unless the computer has a working camera. Instead, upload photos you've already taken with a phone or digital camera into the available slots. You can still choose frames, edit colors, add text, and download the completed strip.
How can I take photobooth pictures with friends in another city?
Use boothsummer's chain strip feature. The first person chooses a frame, takes a picture, and sends a link to the next person. Everyone can contribute using their own device without being online simultaneously. Once all slots are filled, the group can download the completed strip.
Should I print photobooth strips on 4x6-inch or A4 paper?
For traditional 2 × 6-inch strips, 4 × 6-inch photo paper is a convenient option because two strips fit side by side on one sheet. A4 paper can be useful when you want to arrange several strips on one page or leave additional trimming margins. Check the scale and print preview to avoid cutting off important details.
Are photos automatically uploaded when I use an online photobooth?
On boothsummer, regular photo capture and editing are processed on your own device. Photos are uploaded when you choose a feature that requires sharing, such as creating a link, posting to the public gallery, or joining a chain strip. Unfinished chain strips remain accessible for 48 hours, and completed ones for 30 days.